
You must be able to pose for the camera in order to get flattering pictures. Posing is both a verb and a noun, and it takes practice and good direction. If you are not confident about your posing skills, it's best for a professional photographer to help you.
Posing can both be a verb and an adjective
Posing can be both a noun/verb that has many meanings. Posing can be defined as adopting a certain attitude or position. It can also refer to playing a role to impress someone. Posing can be defined as a way to show off one's self in a specific way. The term posing dates back to the 14th century.
You have to practice it.
It takes practice when taking pictures. It is important to space the arm and trunk properly. If possible, place the arm on the upper thigh or hip. If not, place it on your shoulder or back. It is best to avoid shooting yourself straight from the front as this can make your body look unflattering. To create visual interest, shoot at a 45 degree angle.
It should be directed by a professional photographer
Properly posing the subject is essential for a good photo. Posing is more than just telling the subject what to do; it is directing the subject's actions and directing the outcome. Successful photographers know that the passive, point-and-shoot approach is unpredictable and can lead to mistakes. Photographers who are experienced in the art of directing a subject should take charge of posing.
You should do it on a balcony.
A balcony with great natural light is the best place to pose for perfect photos. When the sun is rising, it's best to set up a table for the early morning. This way, there will be fewer people and you can get a table with a good view. You can also stand up and take a picture without disturbing your guests. You can also add interest to your photo by placing railings, plants or other objects in the background.
You should do it from afar
Try to see yourself from a distance when taking a photo. This will help define your jawline, and chin. Also, try to position your camera slightly above your eye level. This will make your body appear smaller, which is great for curvier women.
This should be done using a model
It is important to find the right location for your model in order to take a photograph. You should try to locate a natural spot. Do not ask the model for straight faces and to stare directly at the camera. It could lead to awkward poses and a forced expression. Instead, ask model to look out at beautiful scenery or think about something. This will encourage the model to be more relaxed and allow him to take a natural posture.
FAQ
How can I learn photography on my own?
There are many different ways to learn how take great photos. You could buy a book, attend a class, join an online community, watch YouTube tutorials, etc. But if you want to master the art of taking pictures, there's nothing better than doing it yourself! That way, you have complete control over what goes into each photo. As long as you continue learning, you will always be improving.
One of the greatest things about digital photography, however, is the fact that you don’t need expensive equipment. All you need is a computer with internet access and a camera. You can do the rest.
Here are some tips to get your feet wet:
-
Make sure you are familiar with your camera’s manual settings.
-
Learn how the basic controls work.
-
Take many photos.
-
You can edit them.
-
These should be shared.
-
Keep practicing.
-
Experiment.
-
Consider different angles and perspectives.
-
Use light sources creatively.
-
Practice makes perfect.
-
Don't be afraid to fail.
-
Be patient.
-
Have fun
Light Room is an excellent tool to enhance your images.
Start early to get the best photos possible for your project. It is always better to take as many photos as you can and then choose the best.
Lightroom makes it easy to do this. It lets you see how different settings impact each photo. You can also adjust these settings on-the-fly without going back into Photoshop. This allows you to quickly experiment with what looks good and what doesn’t.
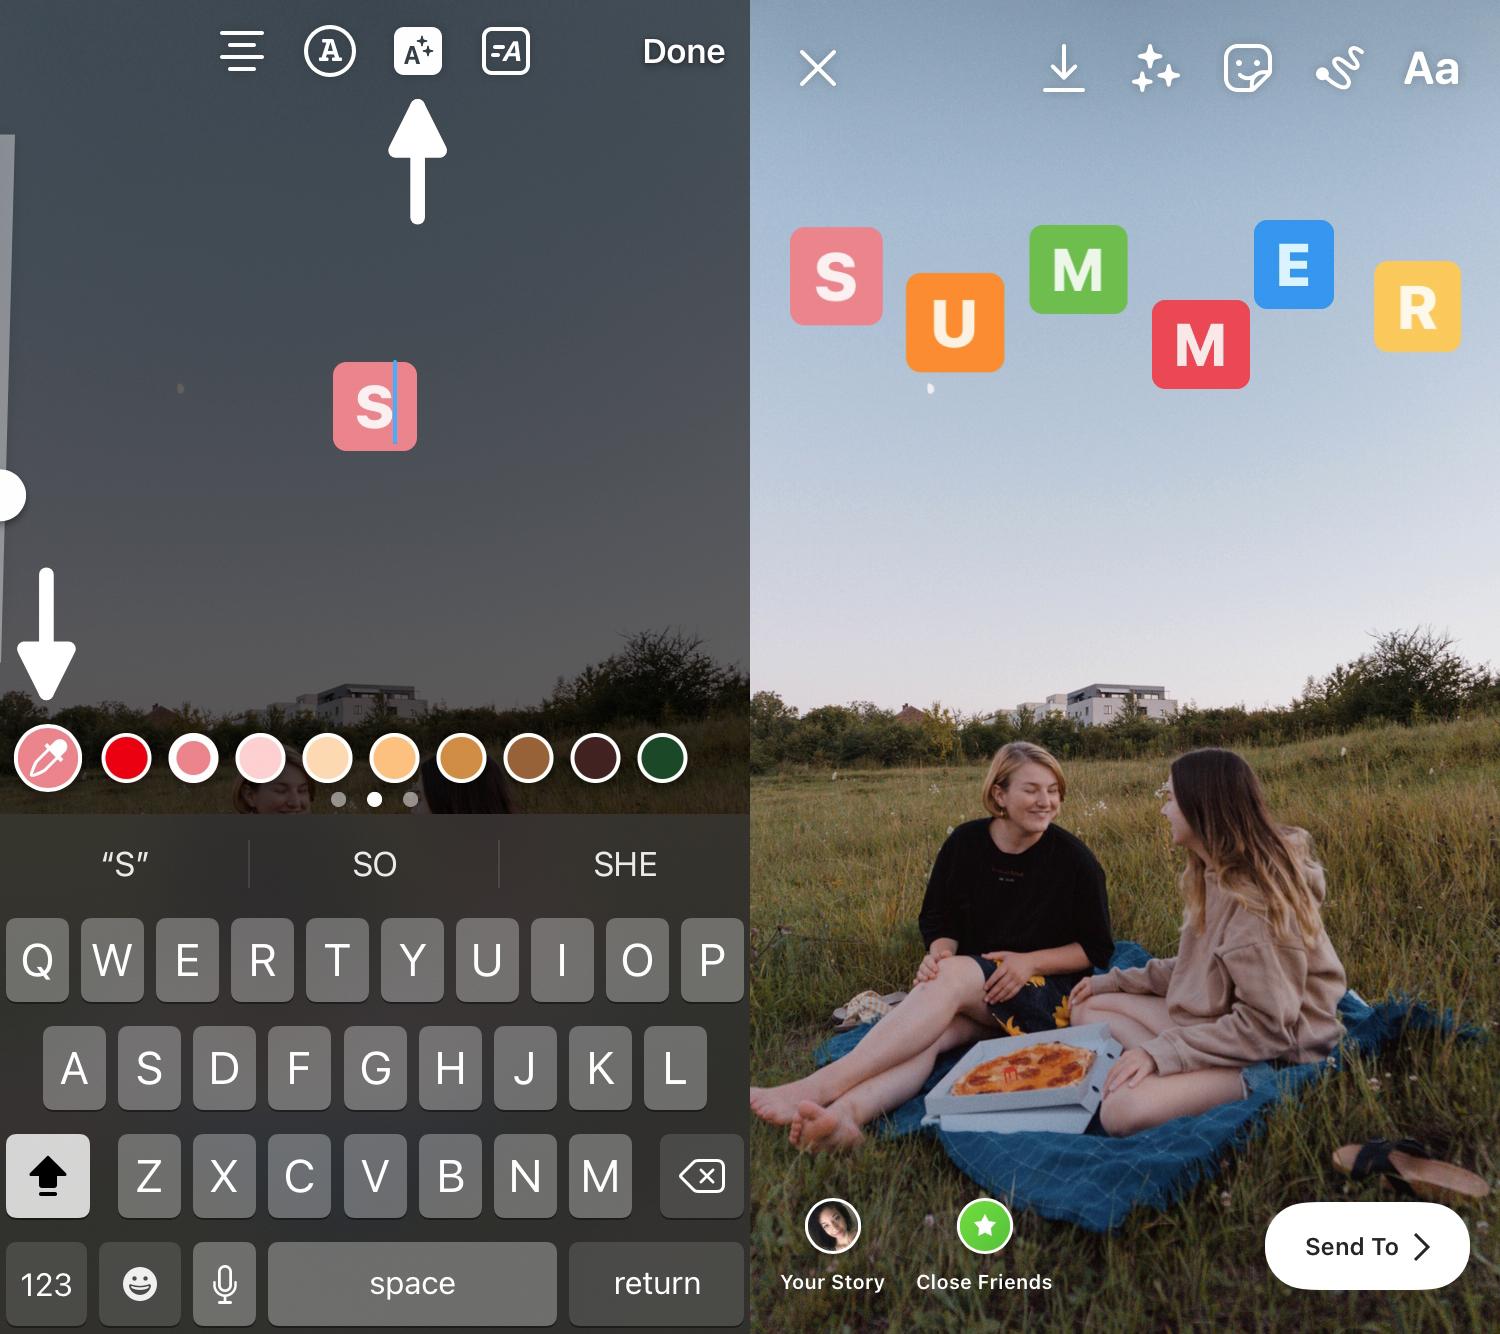
How can my phone improve my photo skills?
Great photos don't require expensive equipment! Amazing photos can be taken with your smartphone.
It is easy to learn how to use its various features and some basic techniques.
There are many apps for iOS and Android devices that can edit and share pictures.
Here are five tips to help get you started taking better photos.
-
Set Up Your Camera App. Your camera app should come pre-installed on your device. You can download the camera app from Google Play and Apple's App store.
-
Use effects and filters. You can change the look of your photo with filters and effects without even touching it.
-
Adjust the Exposure. Adjusting the exposure can help you control the brightness in your picture.
-
Take the right lighting. Bright light allows you to better see the details of your subject. Low light photography allows you to capture shadows and highlights.
-
Photograph People. It is a great way to share your love with others by taking pictures of them.
Check out this article to learn how to take better pictures with your smartphone: 5 Tips To Improve Photography Skills
Statistics
- In this case, 100% of readers who voted found the article helpful, earning it our reader-approved status. (wikihow.com)
- Get 40% off Adobe Creative Cloud(opens in new tab) (creativebloq.com)
- This article received 13 testimonials, and 100% of readers who voted found it helpful, earning it our reader-approved status. (wikihow.com)
- The second easiest way to get blurry photos 100% of the time is to use a cheap filter on the front of your lens. (photographylife.com)
External Links
How To
How to capture pictures under low lighting conditions
Low-light photography means taking photos in dimly lit areas. This requires special equipment and techniques. The key challenges are in controlling exposure, white balanced, and sharpness. Low light photography can be divided into two categories: ambient and flash. Flash photography works well when you have enough light. If there isn’t enough natural lighting, you will need to use a flash. You might need a flash if your subject is outside but indoors. Shooting at night in the moonlight hours is a good alternative to using a flash. This will allow you to get nice shadows and colors. Another option is taking photos at twilight. Twilight is when the sun sets but there's still daylight.
Also, you might want to try long exposures. Long exposures enable you to take images even after your shutter has been open for several seconds. If the shutter is closed, the camera records only the light that falls onto the sensor. This light will continue to fall onto your sensor after a long exposure. However, because the shutter remained shut, no new light enters the lens. The result is that there is very little movement. To ensure clear images, disable any autofocus and exposure settings. Also, make sure that you adjust the ISO setting before you start shooting. An ISO setting of 200 allows you to adjust how bright or dark the image looks. The shutter button should be pressed quickly when you are ready to take the photo. This causes the shutter to close completely. Hold the shutter button down for the final second. You will prevent additional light from entering your camera by keeping the shutter button down. After you've taken the picture, wait a few seconds before releasing the shutter button. This allows the camera to process the image. While you wait, your photos will be displayed on your computer's screen. Once you're satisfied with them, save them to your computer.